
If you have been looking for winter hairstyles for women with a french pin bun elegant enough for a formal dinner and simple enough for a Tuesday morning, you have found the updo that does both. A French pin bun is the hairstyle that looks like you know a secret: one long pin, no elastic, and a bun that stays put all day. It takes about a minute once your hands learn the movement, it works under a coat and a hat, and it makes even second-day hair look deliberately polished. That is why it has become my favourite cold-weather updo, and why it suits almost every winter occasion, from the office to a party.
Winter is hard on updos. Hats flatten them, static pulls them apart, and dry air makes the ends look tired. The French pin bun sidesteps all of that, because the pin holds the twist from the inside rather than squeezing it from the outside, the way an elastic does. The result is a bun that looks soft and a little undone, never stiff, and that survives a commute, a scarf and a woolly hat without complaint. In this guide I will show you 19 elegant ways to wear it, from the basic twist to party versions, work versions and high-bun variations, with the exact pin to buy and the mistakes to avoid.

What Is a French Pin Bun, Exactly?
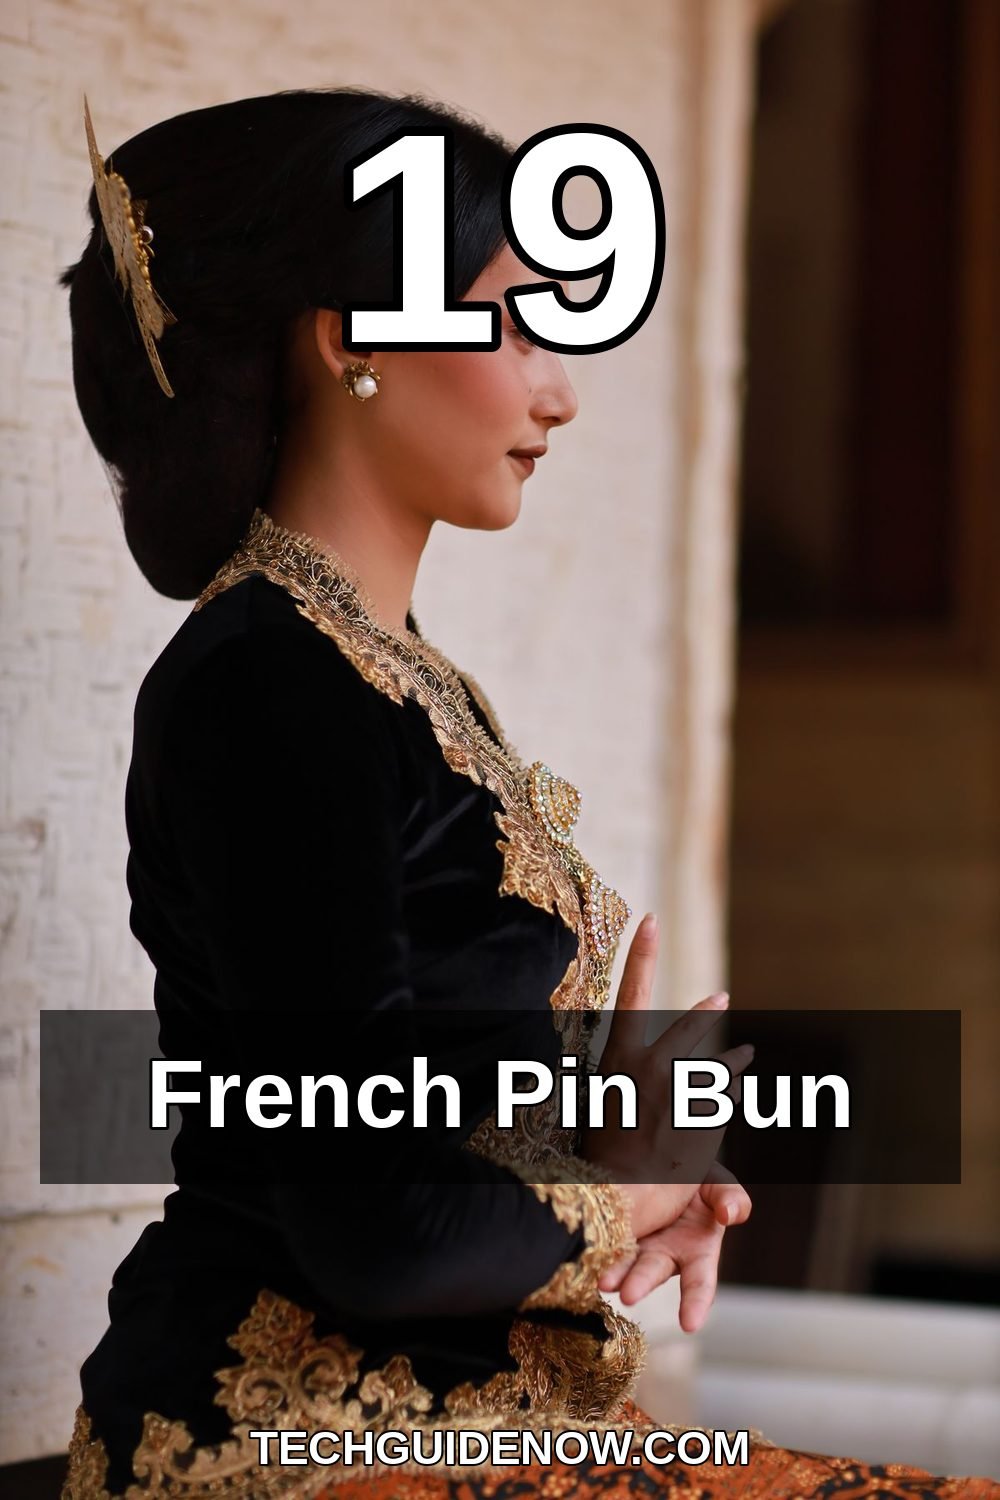
A French pin bun is a bun made by twisting the hair, folding it up against the head, and holding it with a single long hair pin, instead of an elastic. You gather the hair low, twist it into a rope, fold the rope up, and slide the pin through the fold so it catches the hair underneath. The pin does all the holding. There is no elastic to leave a dent, no scrunchie to slip, and nothing to pull at your hairline. The finished bun sits low and soft at the nape, with the twist visible from the side, and it looks far more complicated than it is.
What makes it elegant is the softness. A French pin bun is never pulled drum-tight, and that is the whole point. The twist is left a little loose, a few pieces are pulled out around the face, and the pin itself becomes part of the look, especially if you choose a gold or tortoiseshell one. It works on straight hair, wavy hair and curly hair, on thick hair and fine hair, and it is one of the few updos that actually gets easier the longer your hair is, because the twist has more to hold on to. If you have ever given up on a bun because elastics hurt your head by lunchtime, this is the style that fixes that.

What a French Pin Is (and Which to Buy)
A French pin is a long, straight hair pin, usually about ten to twelve centimetres, with a slight curve and a decorative end. It is not a bobby pin, which is short and springy, and it is not a hair stick, which is usually thicker and worn as jewellery. A French pin is a working tool: it slides through the fold of your bun and catches the hair underneath, holding the whole twist with friction and leverage. You can buy them in metal, wood and acetate, and they cost very little, which is part of the charm. One good pin replaces a whole drawer of elastics and clips.
If you are buying your first one, choose a metal pin with a smooth, rounded tip and a length that matches your hair. For shoulder-length hair, a ten-centimetre pin is enough. For long or thick hair, go for twelve centimetres or more, because a pin that is too short will not catch enough hair and will slide out. Gold pins look beautiful with warm hair colours and warm skin tones, silver suits cool tones, and tortoiseshell acetate works with almost everything and looks expensive. Buy two, not one, because pins have a habit of disappearing into coat pockets, and a spare in your bag means you are never caught without one.

Metal, Wood or Acetate: Which Pin Holds Best?
Metal pins hold best, and it is not close. A smooth metal pin slides in easily, grips the hair with friction, and does not bend under the weight of a thick bun. Wooden pins look beautiful and feel warm, but they can snag on fine hair and they sometimes snap if you force them through a tight twist. Acetate pins, the tortoiseshell and marble ones, are the prettiest and they hold well on medium hair, but they are the most likely to slip on very thick or very silky hair. If you want one pin that does everything, buy metal first and add a pretty acetate one later for parties. And whatever material you choose, make sure the tip is smooth and rounded, because a sharp pin will catch and break hairs every time you slide it in.
The Basic French Pin Bun
Here is the basic method, and it is worth learning properly, because every other version in this guide is a variation on it. Gather your hair into a low ponytail at the nape, but do not put an elastic in. Twist the ponytail away from your face until it starts to coil on itself, then fold the twist up against the back of your head, so the ends tuck under. Hold the fold with one hand, and with the other, slide the pin in from the side, through the fold and into the hair underneath, at a slight angle. The pin should go in easily; if you have to force it, you are going through too much hair, so pull it out and try a slightly different angle. Once the pin is in, let go. The bun should feel secure and comfortable, not tight.
The part most people get wrong is the twist. If you twist too tightly, the bun becomes a hard little rope and the pin cannot get through it. Twist just enough for the hair to hold together, and stop while it still feels soft. Then, once the pin is in, use your fingertips to tug tiny pieces out around the bun and at the front, just a millimetre or two, to soften the shape. That is the whole style, and it genuinely takes a minute once your hands learn it. Practice it three times in front of a mirror and you will be able to do it without looking, which is how you will be doing it most mornings.

The Twist, Fold, Pin Method in Five Steps
One, brush the hair back and gather it low at the nape, with no elastic. Two, twist the tail away from your face until it coils. Three, fold the twist up against the back of your head, tucking the ends under. Four, slide the pin in from the side, through the fold and into the hair underneath, at a slight angle. Five, let go, tug a few pieces loose around the face, and check the back in a mirror. If the bun feels heavy on one side, the pin went in too shallow; pull it out, push it a little deeper, and try again. The whole sequence takes about a minute, and the more you do it, the faster it gets. Keep a pin in your coat pocket for the first week, so you can redo the bun after taking a hat off without hunting for one.
French Pin Bun for Thick Hair
Thick hair is the French pin bun’s best friend, because the pin has plenty to grip. The twist is naturally full, the fold is substantial, and the pin slides through layers of hair that hold it like a vice. The one thing to watch is the pin length: a short pin will not reach through a thick twist, and it will work its way out by lunchtime. Use a twelve-centimetre pin or longer, and slide it in at a slight diagonal, so it catches hair at two different depths. If your bun feels heavy, split the twist into two thinner ropes before you fold it up, and pin each one separately; the weight spreads out and the style feels lighter on your head.
Thick hair also forgives a looser twist, which is good news, because a looser twist looks softer and more elegant. Do not fight the volume. Let the bun be big, let a few pieces fall out around the face, and let the pin show a little, because a long gold pin against thick dark hair is a beautiful detail in its own right. If the ends poke out of the fold, tuck them under with the tip of the pin and push the pin a little deeper. A thick-haired French pin bun is one of those styles that looks better at four in the afternoon than it did at nine in the morning, because it settles and softens as the day goes on.

French Pin Bun for Fine Hair
Fine hair needs the opposite approach: you want grip, and you want the bun to look bigger than it is. Start with a little texturising spray or dry shampoo through the lengths, because clean, silky fine hair is the hardest hair to pin. The pin needs something to catch on, and a little texture gives it that. Backcomb the crown very gently, just three or four strokes, before you gather the hair back, and twist a little tighter than you would for thick hair, so the rope holds together. Then, once the pin is in, pull tiny pieces out around the bun to make it look fuller, and use a second pin crossed through the first one if the bun feels loose.
Choose your pin carefully with fine hair. A heavy metal pin can drag a fine bun down, so a lighter acetate pin is often the better choice, and it has the bonus of looking pretty. If your hair is very fine, the French pin bun still works, but keep the bun small and low, and do not expect it to hold a huge twist. A small, neat bun with a pretty pin looks just as elegant as a big one, and it will hold all day if you add the texture first. And if a few wispy pieces fall out around your face, let them: they soften the look and nobody will know they were not planned.
When the Pin Slips: Quick Fixes
A slipping pin is almost always a grip problem, not a pin problem. If your bun starts to sag, take it down, add a little texturising spray or dry shampoo to the lengths, and redo it. That alone fixes most slips. The second fix is the angle: the pin should go in at a diagonal, catching hair at two depths, not straight across. The third fix is a second pin, pushed in from the opposite side so the two pins cross inside the bun and lock each other. If you have very silky hair, try a pin with a slightly rougher finish, like a brushed metal or a wooden one, because a highly polished pin slides more easily. And never push a pin in with force; if it does not slide in smoothly, the angle is wrong, so pull it out and try again.
French Pin Bun for Parties
For a party, the French pin bun is the updo that looks like you booked a stylist. Start with the basic bun, then add the glamour: a gold pin instead of a plain one, a pair of pearl pins crossed through the twist, or a small sparkly clip just above the bun. Keep it to one statement piece, because the twist itself is already interesting. A low bun with a single pearl pin looks expensive; a low bun with pearls and glitter and a bow looks like a Christmas tree. For more formal updo ideas, see our French twist hairstyles for winter formal events, which pairs beautifully with this style for a full evening look.
For parties, make the tail of the twist a little wavier before you fold it up, because a soft wave in the twist catches the light in photographs. You can do this by curling the lengths in large sections with a curling iron before you start, then brushing them out gently. Keep the front smooth and the bun soft, and finish with a light mist of shine spray over the bun only, not the roots. If you are going from the office to a party, you do not need to redo the style at all: swap the plain pin for a gold one, add the pearl pin, pull a few more pieces loose around the face, and you are ready.

Dressing It Up for a Formal Night
For a formal night, the details matter more than the bun itself. Choose a pin that matches your jewellery: gold pin with gold earrings, silver pin with silver earrings, pearl pin with pearls. Keep your neckline in mind, too. A French pin bun shows off the neck and shoulders, so it pairs beautifully with an off-the-shoulder dress or a high neckline, and it keeps hair out of the way of a statement necklace. If you wear your hair with a centre part, keep the front smooth and symmetrical; if you wear a side part, let a soft wave fall on the side opposite the part. And do a trial run the night before, so you know exactly how the pin sits and how long the style takes when you are not in a rush.

French Pin Bun for Work
The French pin bun is one of the best work updos for winter, because it looks polished without looking fussy, and it stays neat through a commute, a full day at a desk and a meeting you did not expect. A high bun can feel too severe for the office, and hair left down gets caught under coat collars and bag straps, but a low pin bun sits quietly at the nape and reads as deliberate. Pair it with a blazer and small studs for a classic office look, or with a knit and jeans for a relaxed workplace, and it works either way. The pin is the detail that makes it look intentional: it says you chose this style, you did not just throw your hair up.
The trick for work is neatness at the front. Smooth the hair back with a brush and a little styling cream so there are no flyaways around the parting, and keep the bun itself soft. That contrast, smooth front and soft bun, is what makes the style look professional rather than casual. If you have layers that fall out around your face, let two thin pieces fall and leave them alone; face-framing pieces soften the look and stop it from feeling severe. Keep a spare pin in your desk drawer for the days when the bun needs a quick rescue after lunch, and you will never have a bad hair afternoon again.

A Five-Minute Office Version
On mornings when you have five minutes and no patience, here is the fast version. Brush your hair back, gather it low, twist it once, fold it up, and slide the pin in. Do not worry about perfection: a French pin bun looks better a little imperfect, and nobody at work will know you did it in under a minute. Add one extra pin crossed through the first for insurance, mist with hairspray, and pull out two face-framing pieces. That is it. The whole thing takes less time than making coffee, and it looks better than most styles that take three times as long. If the bun feels loose by midday, push the pin a little deeper or add the second pin, and it will hold until home time.

French Pin Bun With a Scarf or Ribbon
A French pin bun with a scarf or a ribbon is the most romantic version in this guide, and it is the one that gets the most compliments. Once the bun is pinned, wrap a slim silk scarf around the base of the bun and tie it in a small bow, or tie a velvet ribbon around the pin itself. The scarf covers the mechanics completely, so all anyone sees is a soft bun with a pretty bow, and it adds a little colour near your face, which is flattering in winter light. Velvet is my favourite for winter, because it grips the hair instead of sliding off it, and it looks rich against wool coats and knitwear.
Choose a scarf about the width of your hand and about sixty centimetres long for a small bow, or longer if you want trailing ends. Tie it after the bun is finished and pinned, wrap it around the base, tie it once, then tie the bow, and trim the ends at an angle so they do not fray. Keep the trailing ends short in winter, no longer than the bun itself, and tuck them inside your coat collar when you are outdoors. Save the pale satin for indoor parties, where it will stay clean and catch the light beautifully, and use deep tones like burgundy or forest green for everyday wear, because they hide lint and look deliberate against winter fabrics.

High-Bun Variations: When the Bun Sits Higher
The classic French pin bun sits low at the nape, but the same twist-and-pin method works higher up, and the high version has its own charm. A high French pin bun lifts the face, shows off the neck, and reads a little bolder than the low version, which makes it a good choice for a party or a night out. To do it, gather the hair higher, at the crown or just below it, twist and fold exactly as you would for the low version, and pin it the same way. The pin holds a high bun just as securely as a low one, but you may want a longer pin, because there is more weight pulling down, and a second pin crossed through the first will give you extra insurance.
The photos below show high-bun variations, not the classic low bun: the same pin, the same twist, but the bun sitting higher on the head. The first is a sleek high bun in profile, the second a high bun in a side view, the third a high bun worn outdoors by the water, and the fourth a neat high topknot in profile. They are useful if you want the elegance of the French pin method with a little more lift, or if a low bun does not suit the neckline of your outfit. Keep the twist soft, let a few pieces fall around the face, and remember that a high bun shows the pin more, so choose one you like the look of.


Keeping a French Pin Bun Comfortable All Day
A French pin bun should feel like nothing at all, and if it hurts, something is wrong. The most common cause of discomfort is a bun that is too tight, which pulls at the hairline and gives you a headache by lunchtime. The fix is to loosen the twist before you pin it, and to place the pin so it holds the fold without pulling the hair at the front. The second cause is a pin that is too short, which means it only catches the outer layer of hair and tugs at it. A longer pin spreads the weight across more hair and feels much more comfortable. And if you have a sensitive scalp, try a wooden pin, which is lighter than metal and gentler on the hairline.
Comfort also comes from placement. A bun that sits too high will pull the hair at the temples, and a bun that sits too low will feel heavy at the neck. The sweet spot is just above the nape, where the head curves in, because the bun rests against the head there instead of hanging from it. If you wear glasses, make sure the bun does not push the arms of your glasses forward, and if you wear a hat, put the bun in first, then pull the hat on from the front, sliding it back over the bun rather than dragging it down over it. A French pin bun is one of the few updos that genuinely survives a hat, because the pin holds the twist from the inside.
Mistakes That Make the Pin Slip
Three mistakes make a French pin bun slip. The first is starting with hair that is too clean and silky, which gives the pin nothing to grip. Add texture first, and the problem disappears. The second is pushing the pin straight across instead of at a diagonal, so it only catches one layer of hair. Slide it in at an angle, and it will hold twice as well. The third is using a pin that is too short for your hair, so it never reaches the hair underneath the fold. Buy a longer pin, and the bun will stay put. Avoid those three, keep the twist soft, and the style will hold from breakfast to bedtime. If a bun does come loose during the day, do not try to fix it in place; take it down, shake your hair out, and redo it fresh, which takes a minute and looks far better than a patched-up bun.
Frequently Asked Questions
How long does a French pin bun take?
About a minute for the basic bun once you have done it a few times, and two minutes for the party version with a prettier pin. It is one of the fastest elegant updos there is, which is why it works so well on busy winter mornings.
Can I wear a French pin bun with short hair?
You need enough length to twist and fold, which usually means hair that reaches at least the shoulders. If your hair is shorter, try a half-up version, twisting only the top section into a small bun and leaving the rest down, which gives you the same elegant look with less length.
Save This Look for Your Next Elegant Updo
The French pin bun is proof that the simplest ideas are often the best ones: one twist, one fold, one pin, and an updo that works for the office, a party, a walk in the cold and everything in between. Try the basic bun first, then make it yours with a gold pin, a scarf, or a high variation, and see how many compliments a one-minute style can earn. If you loved these winter hairstyles for women with a french pin bun elegant enough for any occasion, save the pin below to your winter hair board so you can find it again when the cold sets in.

Want to write the perfect caption for your own pin? Try our free Pinterest Caption & Pin Generator to create a pin caption in seconds. And if you want more winter hair ideas, take a look at our 21 winter ponytail hairstyles for women, and follow Nova Fashion on Pinterest for a new look every day.